Most articles will suggest you change the windows proxy settings to use a proxy on Google chrome. The problem with changing your windows settings is that all programs will start using the proxy you have configured. This article will explain in a few simple steps how to use a proxy on google chrome without changing
Most articles will suggest you change the windows proxy settings to use a proxy on Google chrome. The problem with changing your windows settings is that all programs will start using the proxy you have configured. This article will explain in a few simple steps how to use a proxy on google chrome without changing the windows proxy settings.
How to configure a proxy on google chrome using SwitchOmega
Step 1: Install the SwitchyOmega chrome addon
SwitchyOmega is a simple Chrom add-on to use proxies and allows you to switch between multiple proxy profiles easily.
Download the addon here from the Chrome web store: https://chrome.google.com/webstore/detail/proxy-switchyomega/padekgcemlokbadohgkifijomclgjgif?hl=en
By clicking on “Add to Chrome”

Next, click on “Add extension”

Once installed, you will be greeted by a welcome screen. If you want, you can follow through the small guide provided by the extension itself.
Step 2: Add the proxy
SwitchyOmega will automatically create a default proxy profile with the following details:

You can simply replace this with your proxy, make sure to select the correct protocol of your proxy. For this example, we are using a public socks5 proxy.

As an optional step, if your proxy is using a username and password you can provide this by clicking on the lock icon on the right side.

Once you provided all proxy details make sure to click “Apply changes” in the bottom left corner.

Step 3: Activate the proxy
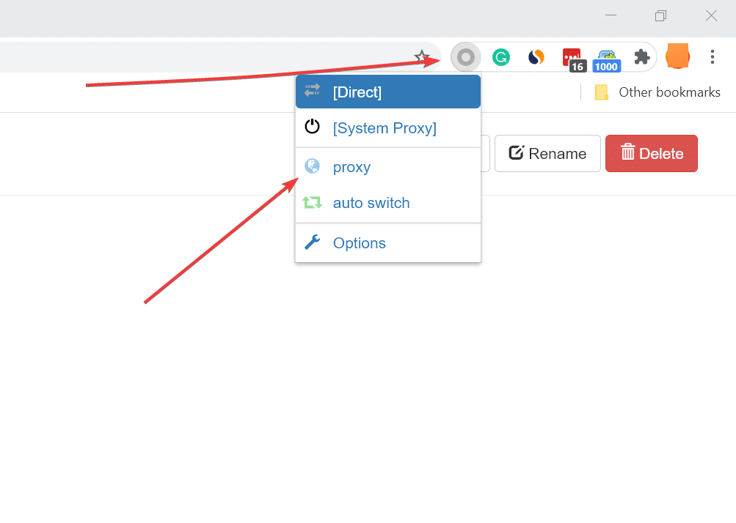
Finally, click on the SwitchyOmega icon in the top right corner of your browser and activate the proxy by clicking “proxy”.

Once you have activated the proxy, the SwitchyOmega icon will turn in the color of the proxy profile you have selected (blue in our case) and you will be able to start browsing via the proxy.

If you wish to deactivate the proxy again you can do this by clicking the SwitchyOmega icon and selecting “direct”.
