
In the digital age, where every second counts, ensuring your website's performance is up to par is not just a necessity—it's a survival strategy. With users' expectations higher than ever, a slow-loading page could mean the difference between a converted customer and a lost opportunity. This is where Apache JMeter™ and proxy servers come into play, offering a powerful combination for load testing your website to ensure it can handle high traffic volumes without compromising on speed or user experience.
Prefer Watching Over Reading? Check This Out:
Introduction to JMeter and Its Importance in Website Performance Testing
Apache JMeter™ is an open-source software designed to load test functional behavior and measure performance. Originally developed for testing web applications, JMeter has since expanded its capabilities to other test functions. It's favored by web developers, performance testers, digital marketers, and quality assurance professionals for its versatility and ability to simulate a heavy load on a server, network, or object to test its strength or analyze overall performance under different load types.
Understanding the Role of Proxy Servers in Performance Testing
Proxy servers play a critical role in performance testing by acting as an intermediary between the user's computer and the internet. This allows testers to simulate requests from various locations and devices without having to physically be in those locations or use those devices. When combined with JMeter, proxy servers enable a more comprehensive and realistic testing environment, mimicking real-world traffic patterns and identifying potential bottlenecks.
How to Configure JMeter with Proxy for Load Testing
Let's walk through the steps to setup JMeter with a proxy on Windows for load testing:
- Install JMeter on your computer through this link https://jmeter.apache.org/download_jmeter.cgi
- After installing JMeter on your machine, open the JMeter folder, navigate to the 'bin' directory, and double-click on 'jmeter.bat'.
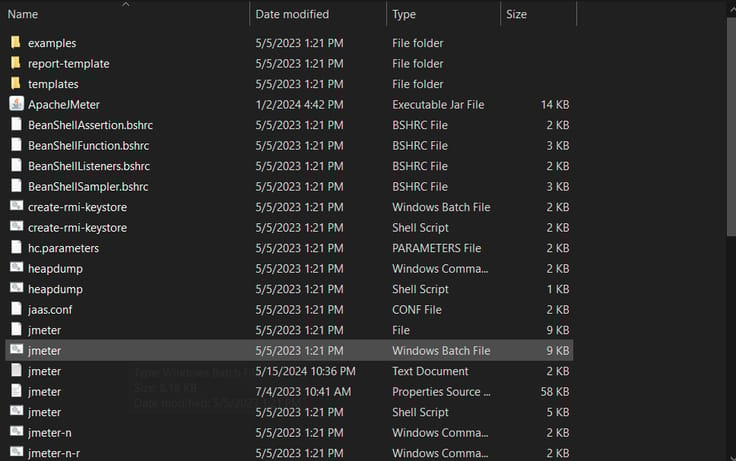
- Once you click that, a window like below will appearThe elements of the tests are located on the left side, while the configuration of each element is on the right side.
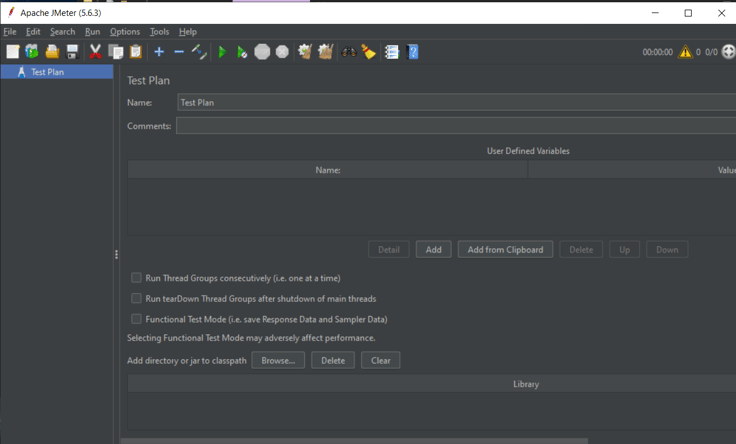
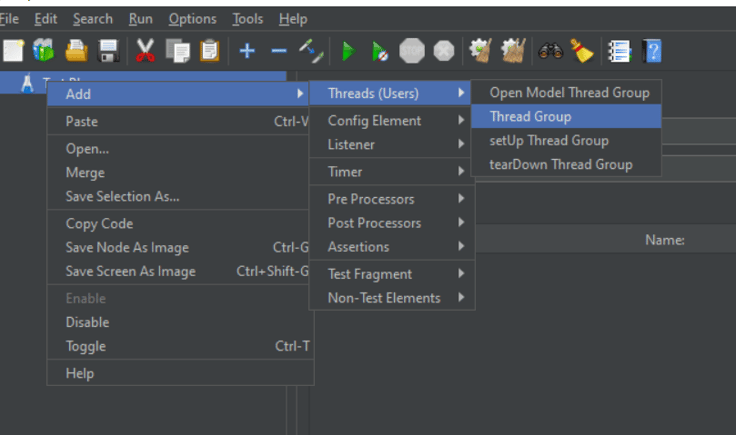
- Next, we will add the Threads, or in simpler terms, the test users, and adjust some related settings.To do this double click on "Test Plan" element and go to "Add" then "Threads (Users)" and then to "Thread Group"
- Now you will see a window that looks like this:

- In this example, we will set the number of threads to 10, meaning the test will be conducted by 10 users. Ramp-up period (seconds) is the time between each user sending a request in this case we leave it as default to 1. Loop Count refers to the number of requests each thread/user will send. We will leave it at the default value of 1.There is also a scheduler available that you can use to send and end requests at specific times. However, for the sake of simplicity, we did not utilize it here.
- Next, we will specify the HTTP request to make to our target test website. For this example, we used https://www.scrapethissite.com/.To do that right-click on Thread Group -> Add -> Sampler -> HTTP Request

- Next, we will add the URL to the "Server Name or IP" field (excluding the http or https portion of the URL). As we are testing the homepage, we will leave the "Path" field as "/".You can add as many requests as you need by again following the same steps
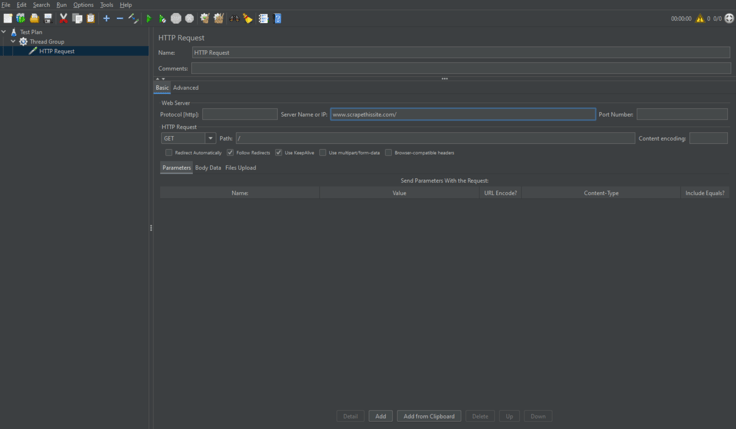
- Now is time to implement a proxy server. For this example, we'll use our residential proxies.So we go to "Advanced" tab then we will the proxy information that is required. In this case we fill schema to "http".Server Name or IP to server name or ip of the proxy providerPort number to the proxy IP's port numberUsername and password fields. If you are using proxies that do not require username and password authentication, you can leave these fields blank.

- Now we are gonna add listeners. They are used to provide the test results. There are different type of listeners in JMeter and many more that can be installed using plugins. The listener that we will use here is the "View Results Tree" .

- Next, we will save these settings to conduct our tests.
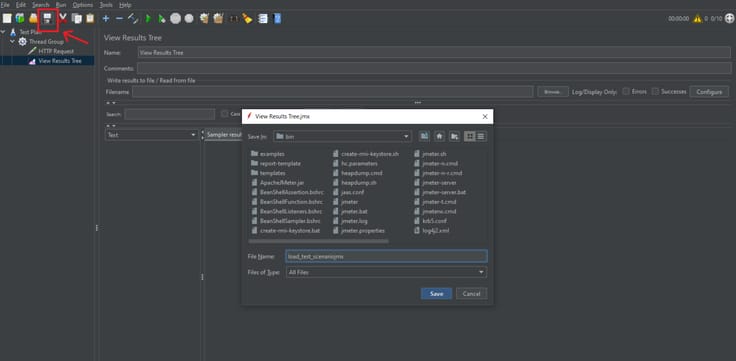
- To run the tests, we will click the green arrow to initiate them.

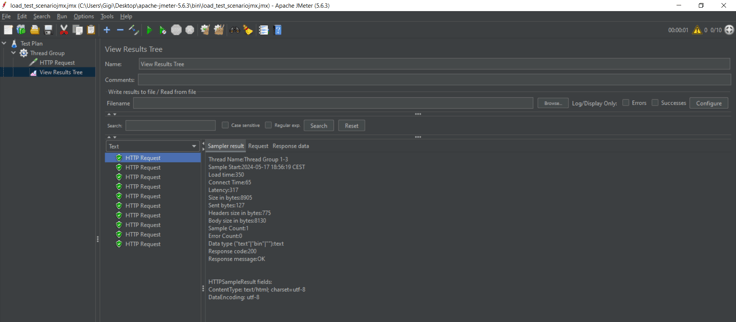
- The results of each request will be displayed in the "View Results Tree" listener.
Real-World Examples of JMeter with Proxy in Action
Consider a scenario where an e-commerce site experiences slow load times during peak shopping hours. By using JMeter with ProxyScrape residential proxies, the site's developers can simulate thousands of users accessing the site from different locations, uncovering that image rendering is the bottleneck. This insight allows them to optimise their content delivery, significantly improving load times.
Conclusion
The combination of JMeter and proxy servers is setting the standard for website performance testing, allowing businesses to anticipate and mitigate potential issues before they affect the user experience. As both technologies continue to evolve, their integration will undoubtedly become more seamless, offering even deeper insights and more robust testing capabilities.
By leveraging the power of ProxyScrape's residential, premium, or dedicated proxies with JMeter, you can gain unparalleled insights into your website's capabilities and limitations, enabling you to make informed optimizations that enhance user satisfaction and drive business success.
Start your journey towards a more performant website today, and unlock the full potential of your online presence with the power of JMeter and proxy servers.